
<HarmO> visits the reed doctor
Thursday, January 7, 2010
By Troy Rogers
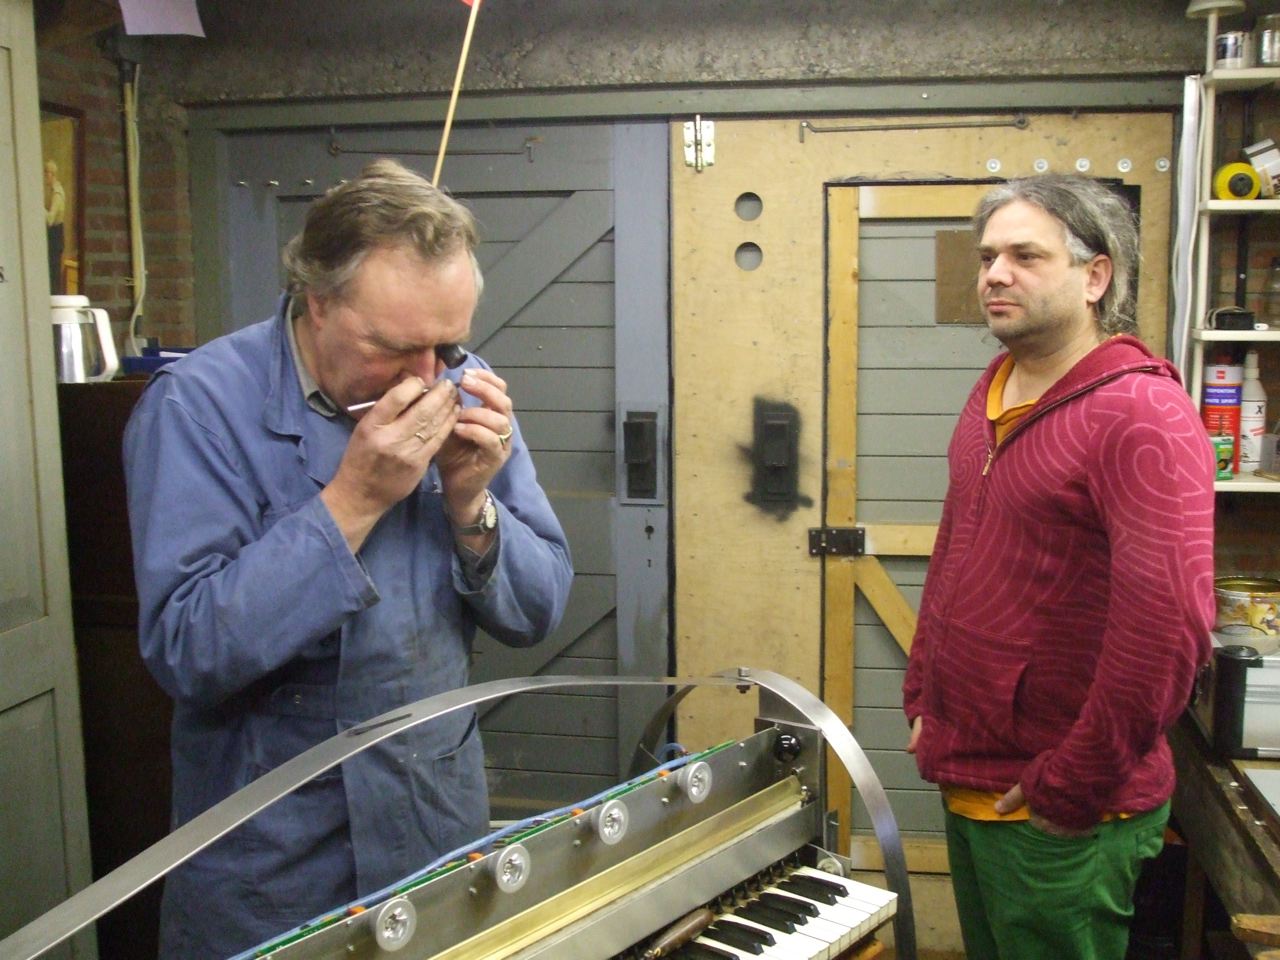
Today Yvan Vander Sanden and I transported <HarmO> to Schüller Harmoniums in Woerden, NL. There expert harmonium restorer Arie Schüller examined and fixed or replaced each reed we had identified as not sounding, sounding improperly, or being out of tune. He was able to fix, tune, or replace approximately 50 reeds, with the exception of the highest notes in the 4’ register, which refused to be tuned and for which he possessed no compatible replacement reeds. In the process Arie graciously shared his knowledge of reed tuning.
Here is brief tutorial on harmonium reed maintenance:
Equipment:
reed pulling tool (can be made by flattening a rod and grinding a hook as Godfried did)
small nylon bristle brush
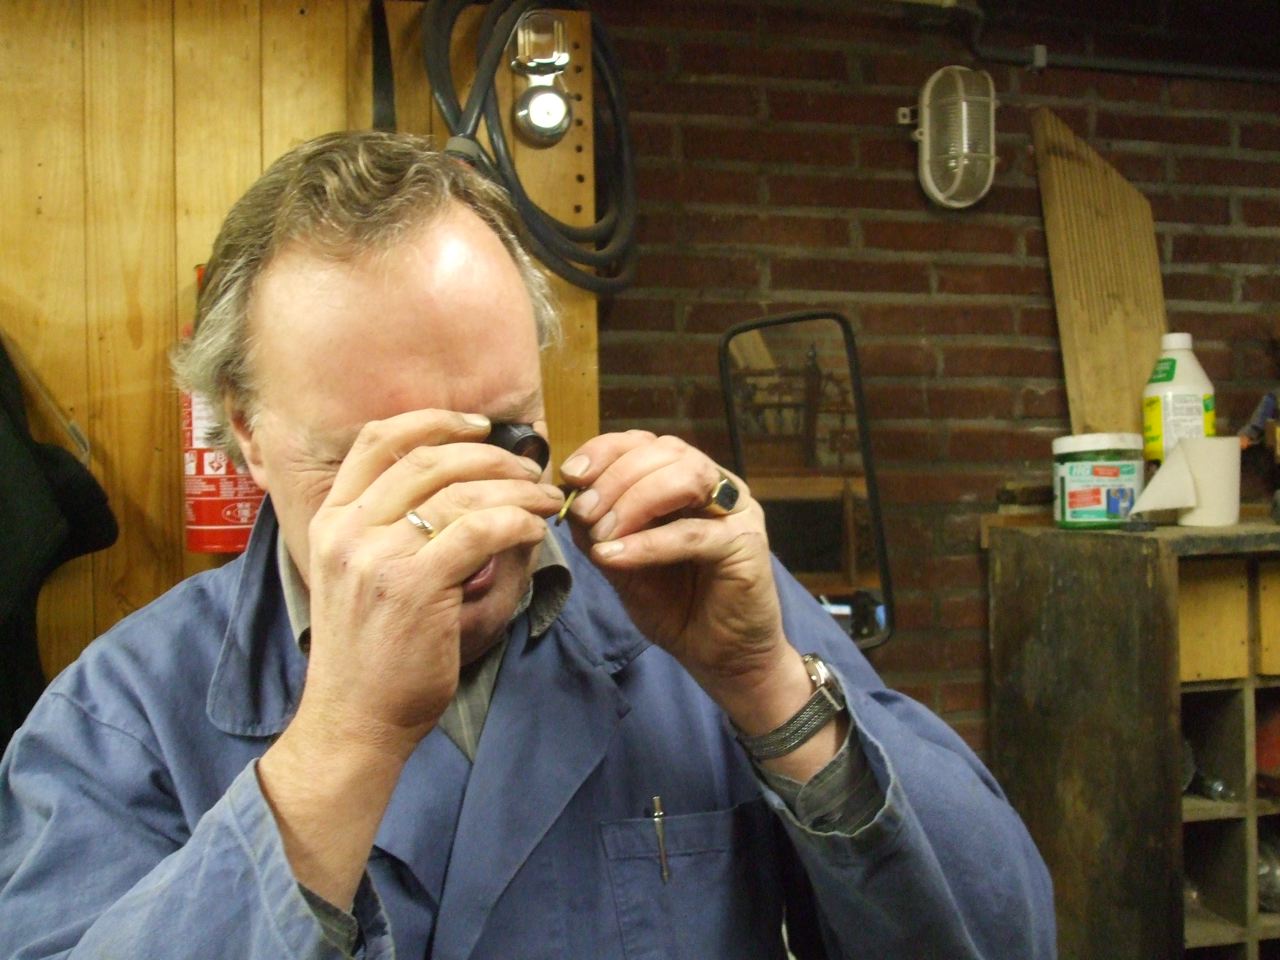
magnifying loupe
guitar tuner
small piece of very thin Hasberg (or possibly a thin razor blade in a pinch)
small, thin, flat fine grain file
reed shaving tool (this can also be made if necessary, see section on lowering reed pitch)
Cleaning
For any problem, whether the reed is not sounding, sounding strangely, or out of tune, the first step is to pull the reed and remove all dust with a small nylon bristle brush (compressed air may also work for this). As with all other procedures, care must be taken not to press the delicate reed into its housing. Gentle brushing is fine on the upper (intake) side of the reed, but for more stubborn dust a bit more pressure can be applied on the underside. After initial brushing, hold the reed up to the light to ensure that all dust has been remove from the edges. Here a magnifying loupe can be helpful, particularly on the higher (and thus smaller) reeds. Use the Hasberg blade to scrape away any lingering dust particles until the reed is clear of debris.
The reed can be tested by sealing the lips around it and sucking (never blow, just as you would never push on the reed). Arie demonstrated that there will typically be a range of reeds that will not sound in this way (usually in the mid-range of the instrument). These reeds will need to be replaced in the instrument before they can be tested. It should be noted that this test is most useful for verifying whether a reed is capable of vibrating freely (sounding), and for coarse tuning. For fine tuning it is generally necessary to replace the reed in the instrument, as this placement affects its tuning slightly.
Retuning
A good guitar tuner should be utilized to check reed tuning. Prior to our trip to Woerden, we made the mistake of checking the pitches of <HarmO>’s reeds relative to other reeds (or the piano), which meant that we sometimes noted a reed of the higher or lower octave as being out of tune, when in fact the reed used as the relative reference was itself mistuned. To avoid such situations, an absolute reference should of course be used as a supplement to careful listening.
Raising the pitch
If a given reed is too low, remove it from the instrument, and clean the dust away if necessary. Slide the Hasberg blade in between the reed and the housing, until it reaches the base of the reed. This will support the reed, holding it away from the housing and preventing it from being bent. Next, use the small flat file to remove some material from the free end of the reed. Use light, gentle lengthwise strokes. Particularly on the higher and smaller reeds, one or two gentle strokes of the file can remove enough material to raise the pitch by a good portion of a semitone. Test and repeat as necessary.
One potential complication that can arise in the process of raising the pitch is that filing can leave a burr on the edge of the reed. If after attempting to raise the pitch, the reed fails to sound properly, this is likely the reason. To remove said burrs, use the Hasberg blade to gently pull the reed clear of the housing so that the problem edge can be filed clean again (hold the reed up to the light and search for the burr-blocked portion using the magnifying loupe).
Lowering the pitch
If a reed is too high (or if you remove too much material from the end of the reed while attempting to raise the pitch), material must be removed from the base of the reed. To do so, again support the reed with the Hasberg strip. The procedure here is to use a reed scraping tool or blade to shave material off of the reed. Begin near the midpoint of the reed, holding the scraping tool as level as possible across the top of the reed. Lightly scrape, in one smooth, gentle, continuous stroke along the length of the reed, from the middle to the base. Again light pressure and only one or a few passes will generally be sufficient. It is very easy to remove too much material. Check the pitch and repeat as necessary.
Note on reed scraping tool: in a pinch, a razor blade could be used for lowering the pitch, although the challenge would arise in holding the blade level across the width of the reed. It would also be possible to make this tool by grinding a notch in the end of a length of thin rectangular metal bar, and then leveling and sharpening the inside edge of the notch. The idea is to create a flat, sharp edge that can be pulled along the length of the reed to evenly shave material from the top surface of the reed.
Changing the timbre/perceived loudness
If a reed is too bright, too loud, or too ‘punchy’ in sound compared with its neighbors, gently press to bend the reed toward the housing. This is the only situation in which the reed should be pressed in toward the housing, and care must be taken to avoid permanently damaging the reed by bending it too far. Properly done, this will ‘soften’ the tone.
If a reed is too soft or mellow compared to neighboring reeds in the same register, gently bend the reed out from the housing (pull out using the Hasberg blade). This will brighten the tone and/or increase the perceived loudness of the reed.
Replacement
Overworking the reed will eventually lead to failure, at which point the reed must be replaced. If a reed gets warped in the tuning process, or if a section of it is torn away, the reed will need to be replaced. One of <HarmO>’s reeds was already damaged on initial examination (the free end of the reed was missing a corner).
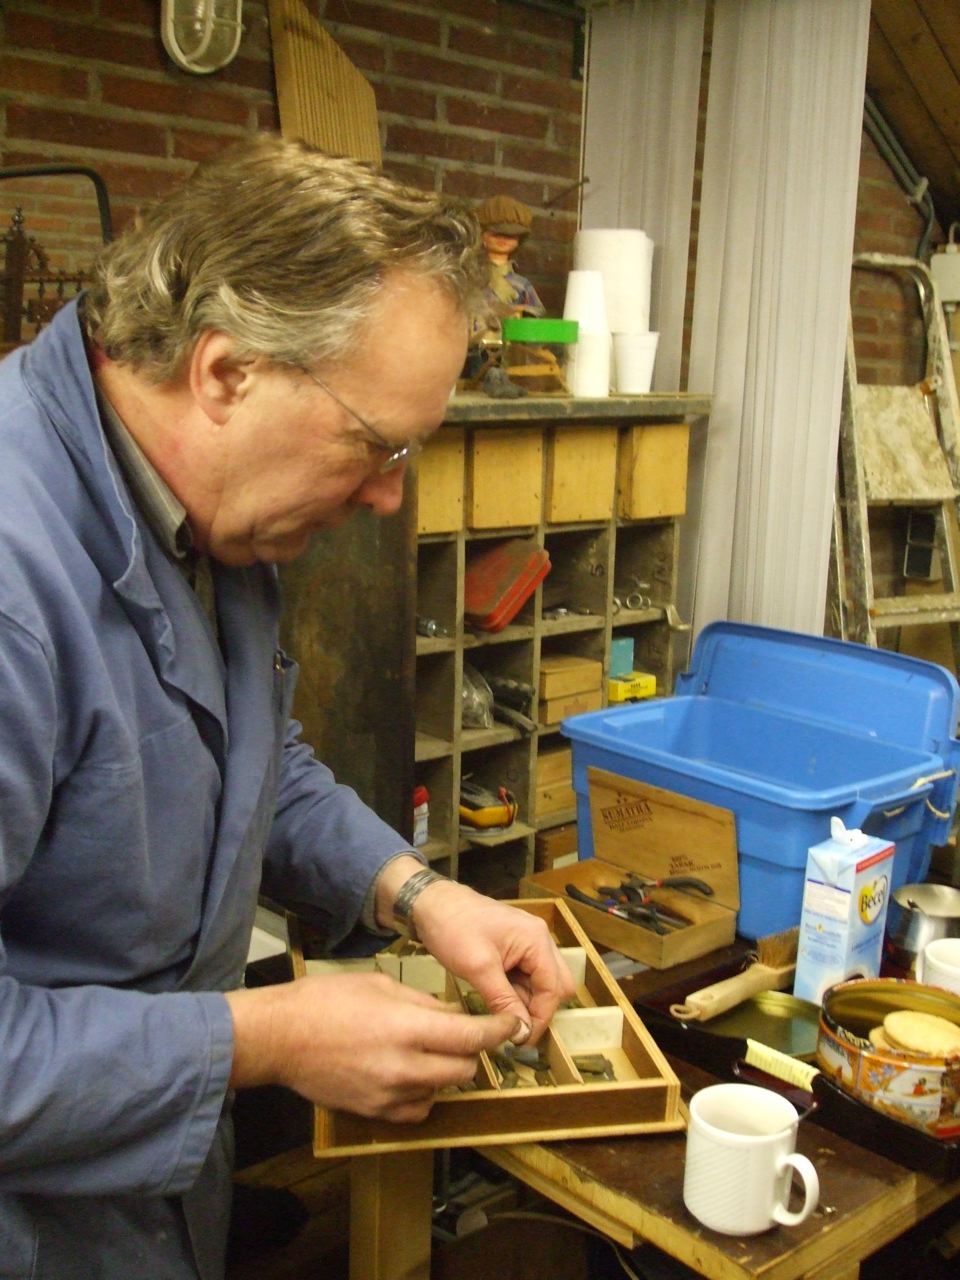
The replacement reed must be dimensionally compatible with the original--the width, length, and thickness of the housing, as well as the width of the reed itself (the width of the reed controls timbre and is the parameter that changes the character--’oboe’, ‘clarinet’, etc.) must match. Arie had numerous drawers full of replacement reeds in his shop. He was able to replace the few that needed replacing from the various registers, but didn’t have any in stock for the highest notes of the 4’ register (it is apparently common in restoration to replace these difficult to tune and source reeds with those an octave lower, which makes sense for a manually performed instrument, but not for an automated instrument).
Here’s a little video of Arie at work: